Using PhotoScape photo editor, you can make outstanding photos in two mouse clicks. In this tutorial we will shed light on delicious photo editing software that lets you add effects, filters and frames to pictures and make incredible animated GIFs. Plus, don’t forget to check our “Bonus” at the bottom of the post.
SEE ALSO: Photofunia: How to Edit your Photos for Fun
Apart from adding effects and frames the free image editor offers us a great spectrum of features: for example, you are welcome to create laughable or romantic GIFs in the menu Animated GIF. In Page tab you can merge multiple photos into one, in Combine – create a collage and in Splitter “tear” one photo into pieces. Try Print, Screen Capture, Rename and RAW (to JPEG) converter for corresponding actions. You can choose the required procedure at the very beginning or change your mind therefore. Quick menu buttons at the top will ease your decision.
And Editor seems to be the most captivating and useful PhotoScape tool. It lets you change photo size, crop, rotate it and make completely unrecognizable. Here you can add filters, effects and frames to your photos without reading tones of Photoshop theory.
How to Apply PhotoScape Filters to your Photos
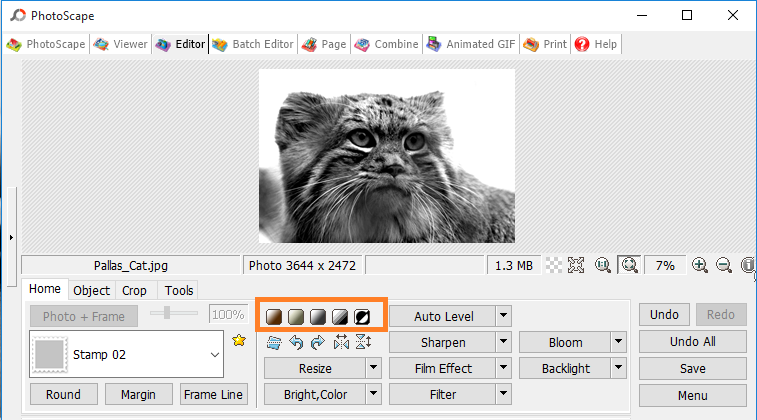
There are over 50 filters that you can use to tweak your pictures. They all can be found in Editor > Home > Filters. If you have used any other photo editor (even including Instagram), you will see that the set of filters is basic: blur, noise, texture, film editing (cross process), antique photo and others. PhotoScape is definitely more advanced. Unlike online photo editors or headshot generators, PhotoScape allows you to apply multiple filters to one image at a time. And you are able to revert all changes! So let’s see how to play with PhotoScape filters:
- Open PhotoScape. Go for the Editor tab of the carousel.
- Choose a photo from the PC files catalog in the left menu.
- Go to the bottom of the editor and find the Home tab.
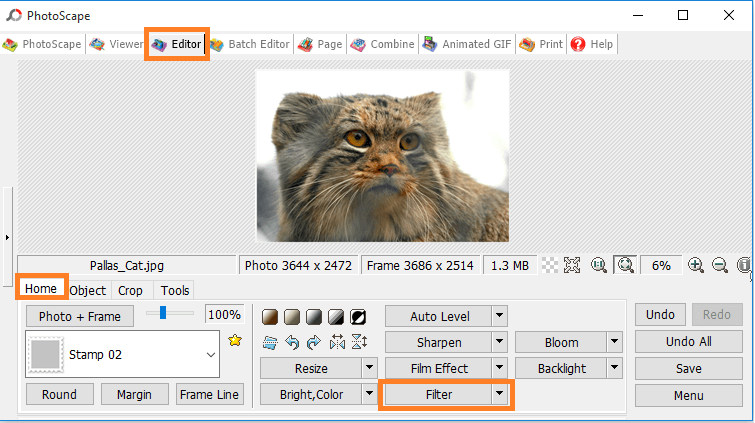
- Click on the Filter button. It will open a lengthy list of possible filters such as New film effect, Vignetting, Blur, Antique photo, Gradient, Jitter, Newsprint, Reflection, etc. For example, you can turn your pic into black and white for a vintage look (see the screenshot below). But to mix color scheme, use the color boxes above the Resize option.
- Once you choose desired filter(s) and preview it in Editor, click the Save button. Remember, PhotoScape doesn’t replace the original image. It saves your creatives into additional folder, so you can get back to the initial image if you don’t like the edited version.
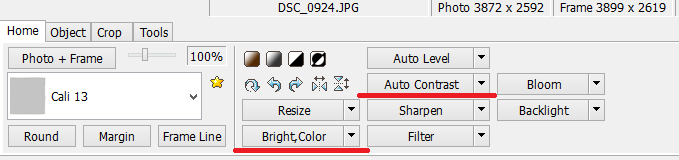
The same thing can be done with Bright, Color and Contrast.
How to Add Frames to your Photos
PhotoScape has a rich collection of photo frames for all events. Some of them are romantic, some delicate, some funny, some classic. There are even Christmas, Soccer and Wedding photo frames. Fortunately, all of them are 100% free. No paid or subscription-based frames. If you adore some frames, add them to Favorites to have a quick access.
- Open PhotoScape. Click on Editor.
- Browse the left menu and locate your photo.
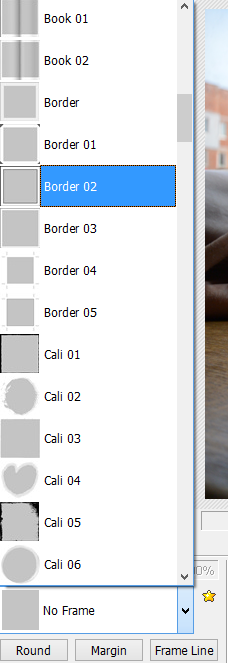
- Find the No Frame sign at the bottom menu. Click it and you’ll get the list of 150+ frames: Book, Antique, Polaroid photo, Heart, Circle, Clip, Dot, Film, Gradient, Note, Shadow, Tape, and so on.
- You can apply only one photo frame. So make your choice and click the Save button. If you don’t like a frame, click on another template or the Undo all button.
How to Add Cool Effects to your Photos
Ok, the previous two features were quite clear. You just need to use the corresponding buttons to add Frames or Filters. But PhotoScape empowers you with tons of cool effects that turn your simple pictures into funny collages or serious slides. Here they are:
- speech bubbles;
- stickers;
- text;
- symbols & icons;
- drawing;
- and it all together!
SEE ALSO: Burn DVD Photo Slideshow: Step-by-Step Guide + Free DVD Burner
Follow our step by step guide to apply effects in PhotoScape:
- Start PhotoScape software. Click on Editor.
- Use the left menu and locate your photo.
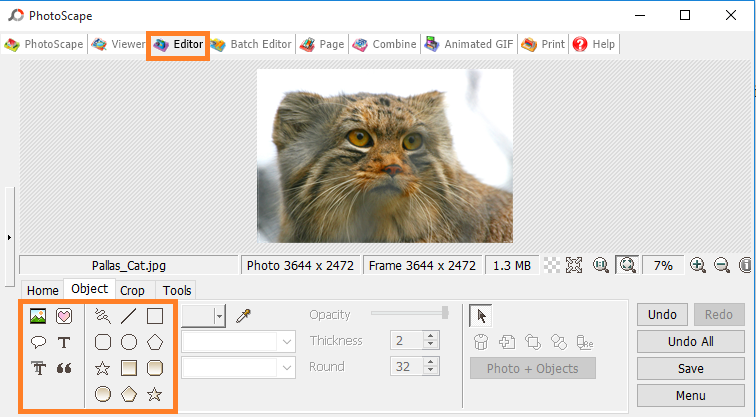
- Find the Object tab at the bottom menu.
- Select an effect that you want to try. For instance, let’s start with stickers, so click the Heart sign (see the screenshot for details).
- Select an effect type like animation, makeup, real picture, sign, number, logo, stamp, etc. I used Animation for the image below.
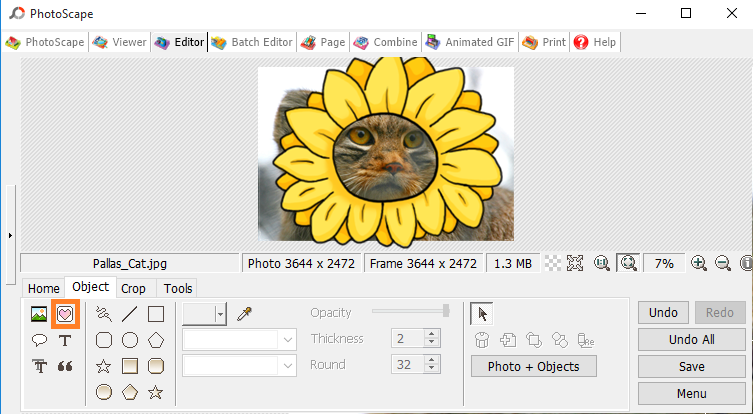
- To save changes as usual click the Save button. That’s it. All you need is your imagination to invent a cool effect for a picture.
How to Make Animated GIFs out of your Photos
If you prefer to use desktop software to online GIF makers, then PhotoScape can be your best help. Visit Animated GIF section and turn your images into motion pictures. Here’s how to do it quickly:
- Launch PhotoScape software. Click on Animated GIF (AniGif).
- Click the Add button on the right to add several images that you plan to turn into GIF.
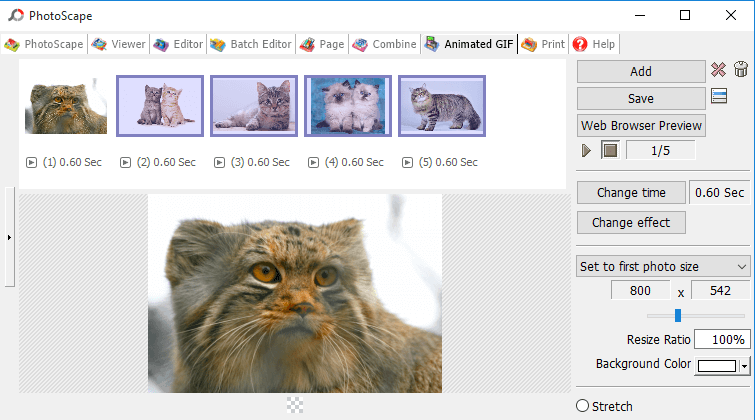
- Use the Change time button to define how long each photo will be displayed.
- Click Web browser preview to see the possible result. Edit if necessary.
- If you are happy with your animated short GIF movie, then click the Save button.
Today, we’ve examined top PhotoScape features. Here’s overall rating:
The good:
- This software is completely free.
- Besides, it is definitely quick-to-work and user-friendly.
- All the effects look natural and true-to-life.
- You can reach the required effects in one or two clicks as all the filters have auto levels.
- If your desire is to tune the filter yourself or you are an experienced photo artist, you can both tune the amount bу gradient moving or just type the number you need.
- It is possible to redo and undo a single action or all of them.
The bad:
- Even though this photo editor is much easier than Photoshop, it requires some background photo knowledge for more rapid usage.
- Using the Hue filter you won’t find proposed colors, so this usage will appear sophisticated.
- Using every filter, if you are not satisfied with the result you can “initialize” it to start. But if you suddenly change your mind, there will be no way back.
BONUS! 5 Hidden Photoscape Features
Photoscape has 5 secret features for photo editing which you don’t pay attention to. Let’s uncover them.
Color Picker
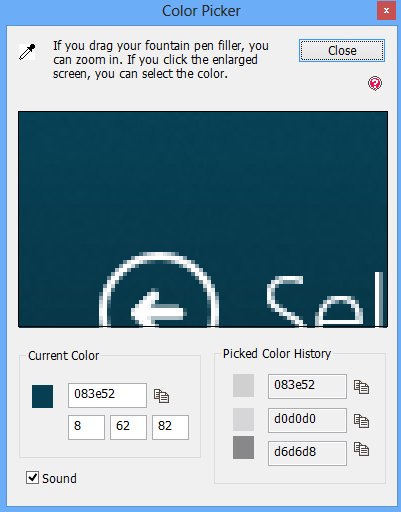
Color Picker will help you apply a definite color while painting. You can pick the required shade from any place on your screen. To do this:
- Open the Color Picker.
- Click on the icon in the top left corner.
- Drag it into the required area.
- Hold ALT and click on the color you want to pick.
- To save it to the board, click on the icon near the palette. But be aware, that only 3 colors are available for saving.
Raw Converter
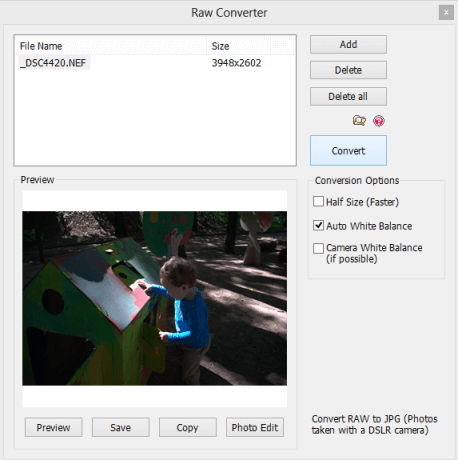
Raw is a series of formats, used by most high-quality cameras (.CR2, .CRW, .NEF, .NRW). They provide you with better quality than JPEG. But sometimes image viewers don’t support RAW format. In this case you’d better turn to PhotoScape image converter. Here’s how to convert RAW to JPEG in PhotoScape:
- Open Raw Converter and add the required files.
- Look, you can alter White Balance and some other properties of the pic.
- Click the Convert button and save the outcome in the folder. The source photos won’t be replaced.
Screen Capture
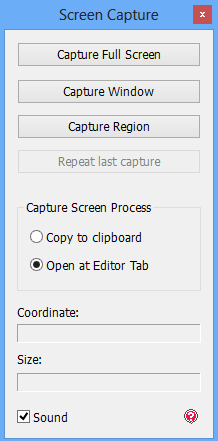
Actually, screen capture is the default function of your PC. You can use different apps and software for making screenshots and PhotoScape is one of them.
After clicking on Screen Capture, you will face the window with options. This window will remain above all the others. Now you choose to capture full screen or a part of it. You can also set the destination of your screenshot and copy it to the clipboard or open directly in PhotoScape Editor. If the shot is lost, you are always welcome to repeat it.
Splitter
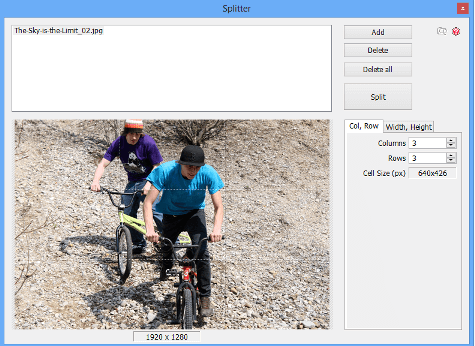
Splitter, as the name tell us, divides your pic into pieces. Set the number of columns and rows and PhotoScape will put a grid above the image. Or you can set the properties of every square and fit the pieces into them. The last step is to choose the destination folder or save the image in the default folder.
Paper Print
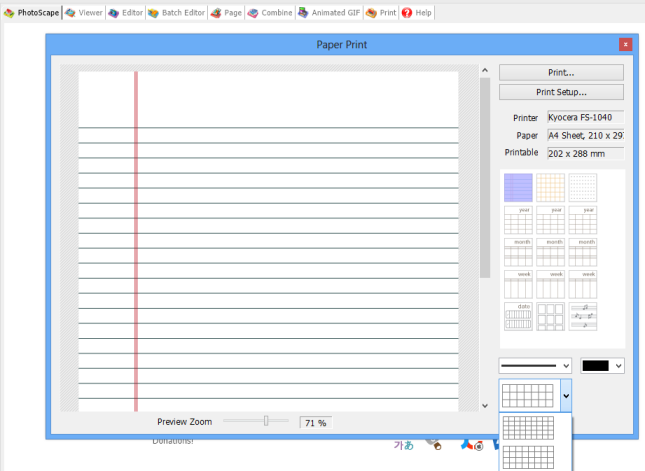
Paper Print is a texture that resembles a school notebook, a schedule or music sheets. Select the sample, choose color and size and send it to your local printer.
All in all, PhotoScape seems to be a perfect alternative to Photoshop, but for less tempted users. So to say, if you are not a professional photographer , you won’t regret downloading this freeware.
You are sure to be thrilled to discover lots of filters, magically change home-made photos into professional once and hear your friends’ WOWs and OHs. Aren’t you?