How to cut video quickly & free

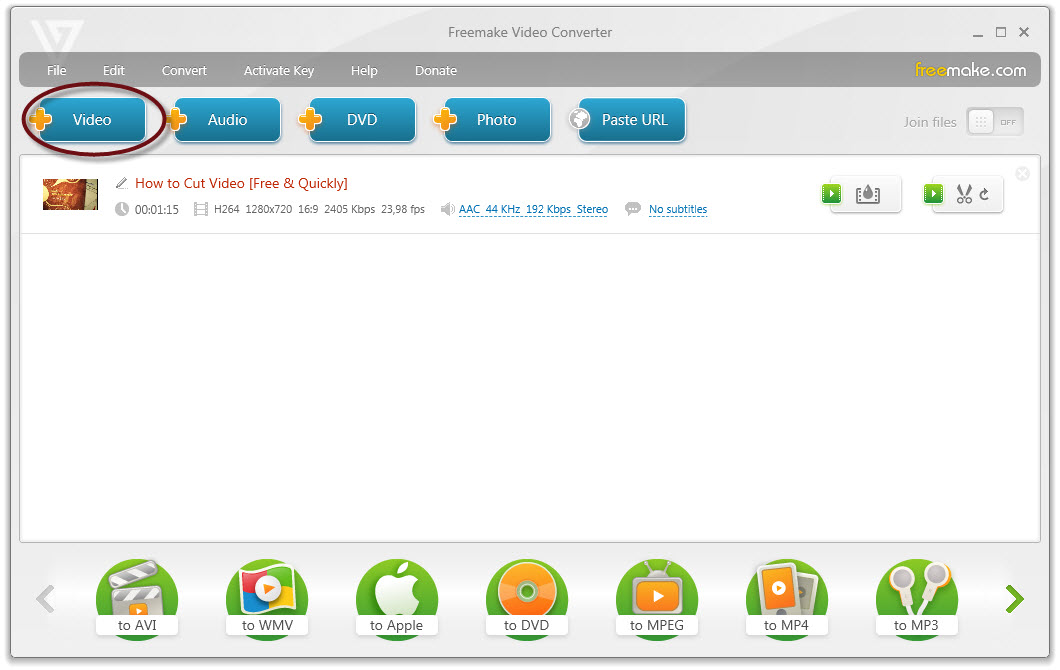
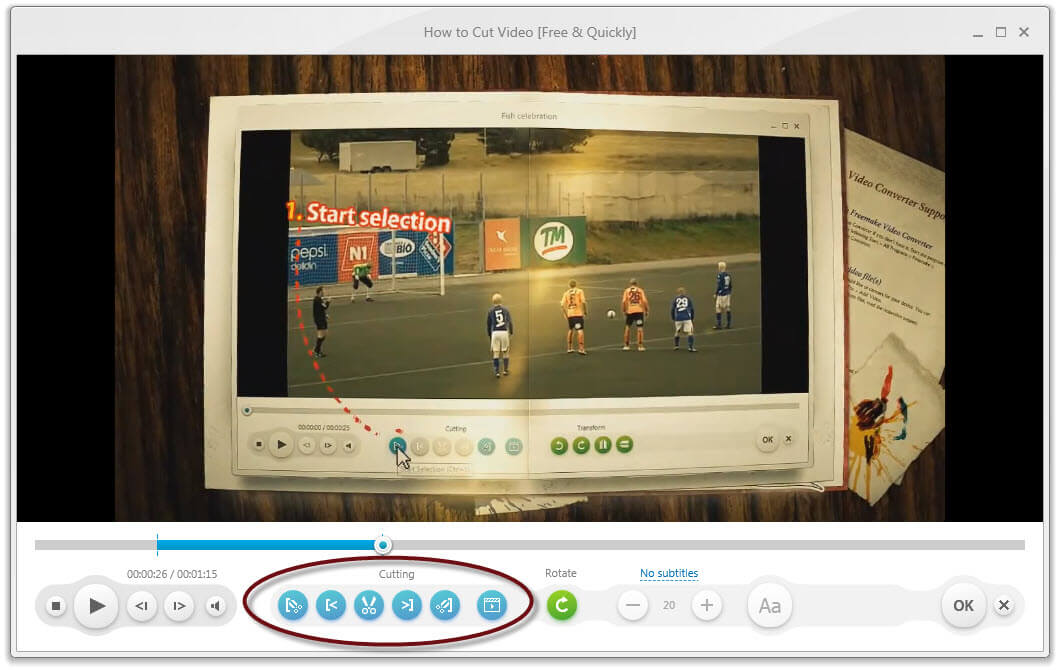
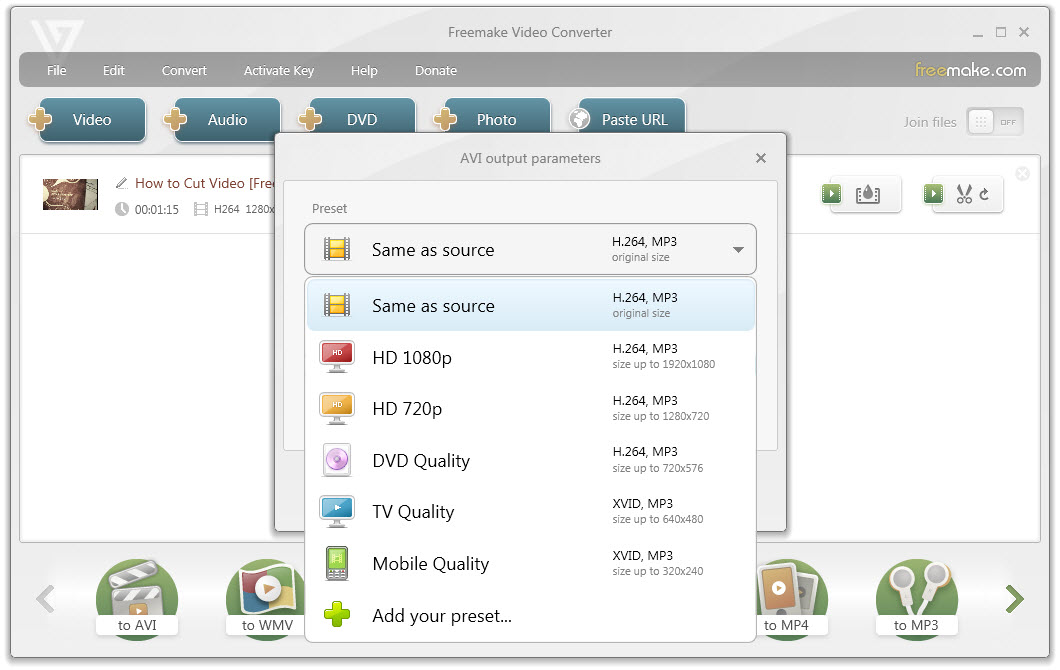
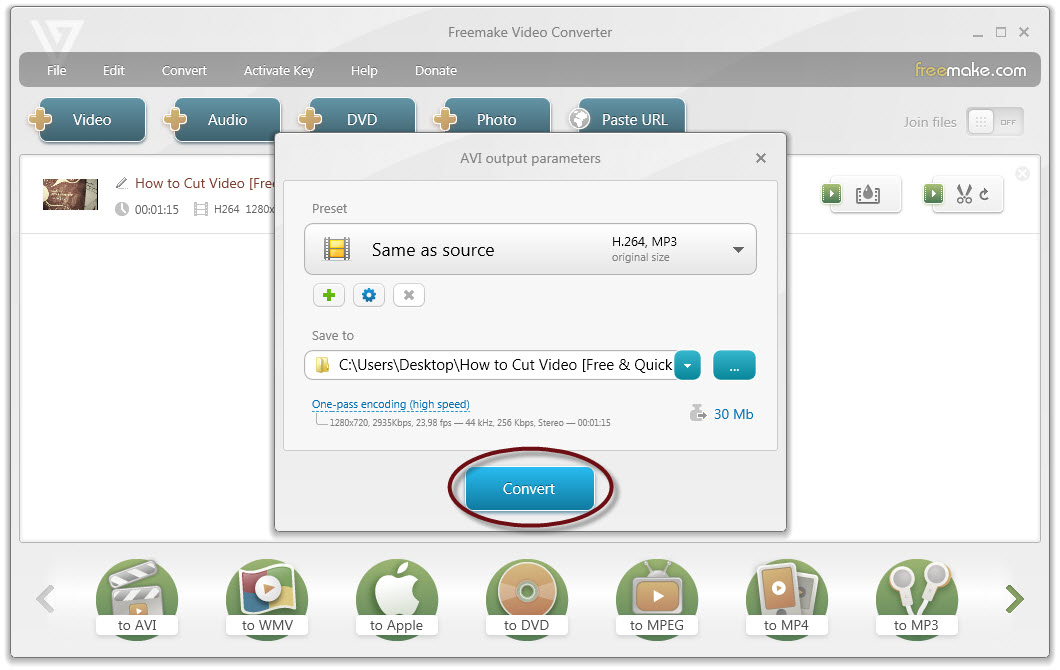
Wonder how to cut unnecessary video parts or ads fast? Go for free Freemake Video Cutter. It will quickly delete any unwanted minutes from your long movie or divide it into parts for a comfortable editing or playback. Freemake accepts 500+ video formats, trims large HD files, keeping the original quality, and saves films in most popular formats. Best video cutter of 2019!
Free Download
Get the job done in these easy steps:
1. Download video cutter
2. Add a file
3. Cut video easily
4. Set final file settings
5. Save changes

Download best video cutter & learn how to cut a video:

1

Download free video cutter

Download the movie cutter software here on your Windows PC (the supported OS's are Windows Vista and higher). Start the installation process right from your browser by double-clicking on Freemake installer.

The installation file detects the language of your system and by default provides the initial information in that language. Change it when the installer asks you what language you prefer to use. Then choose a path for the software.

By default, it’s a Program Files folder on your C drive. Complete the process by clicking Next all the time. The app will start immediately after the installation procedure is completed.
2

Add a video to trim

Add media to trim using the "+Video" button. Or simply drag-n-drop the files in the tool.

One more way is to click File – Video… and select the clips that you want to make shorter. Add any movie extension: MP4, FLV, AVI, and others.

You may add several videos to cut at once into the freeware, but you will need to trim them one by one.
3

Cut video

Open the built-in clip editor. As soon as you're ready, click the scissors button next to the film in the program to cut videos.

In the editor, pay attention to the bottom buttons. You’ll need three blue buttons with scissors. Use the left one to mark the beginning of a part you want to remove, then, click the right one to set the end of the time sequence. And finally, click the middle button to remove the undesired part. Delete more moments in the same way.

When you are satisfied with the result, press the "OK" button.
4

Set final file settings

Now check the bottom bar of the utility to cut videos. You’ll see numerous output choices there. Select between a regular media container for a PC or a specific one like MP4 or 3GP for a portable device. Pick up the one you need. In a new window, choose your device or a necessary film quality that suits your needs best of all (Ultra HD, HD, medium, etc).

Please note:
To watch the shorten movies on your portable device, you can use the reduce file size option. Hit the weight sign next to the destination path line. Insert the size you need. Please don’t go beyond the size suggested by the freeware or you will spoil your film.
5

Save cutting changes

Remove the parts of a film. Having finished with the settings, choose a folder for your new clip. It can be a hard drive or an external drive or an online cloud service. Then press the "Convert" button and save changes to cut your video.

Please note that you can not cut the films without the conversion, otherwise your settings won’t be applied.

After everything is done, open the clip with a desktop video player like VLC or Windows Media Player to check that the trimmed video.

Further, you may transfer the clip onto any device or burn onto a disc free with our free DVD burner software.