How to Make a Slideshow with Music

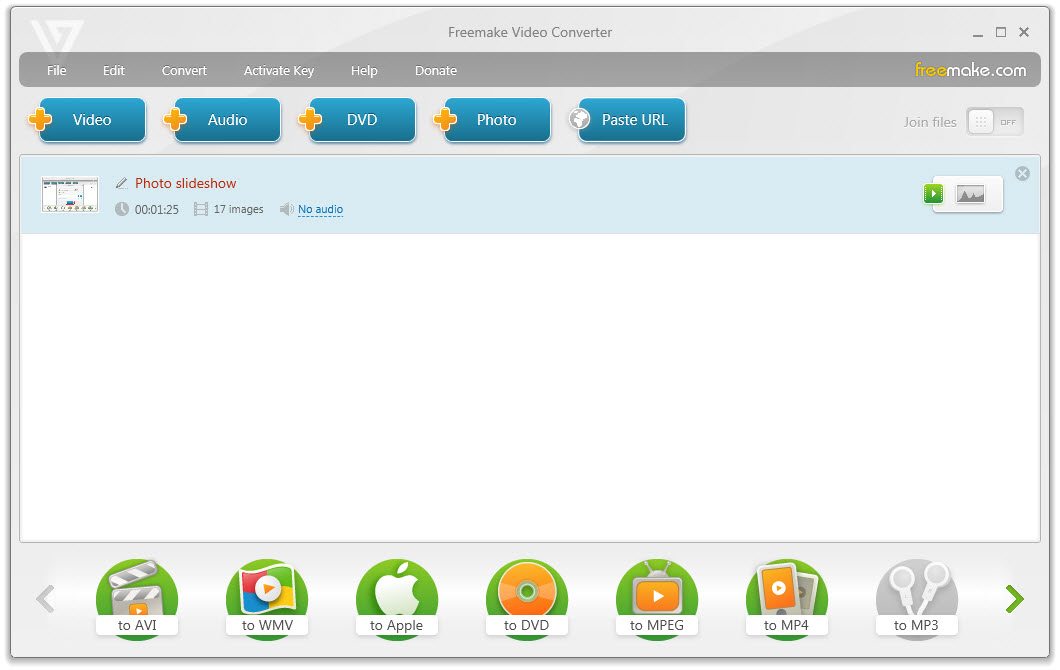
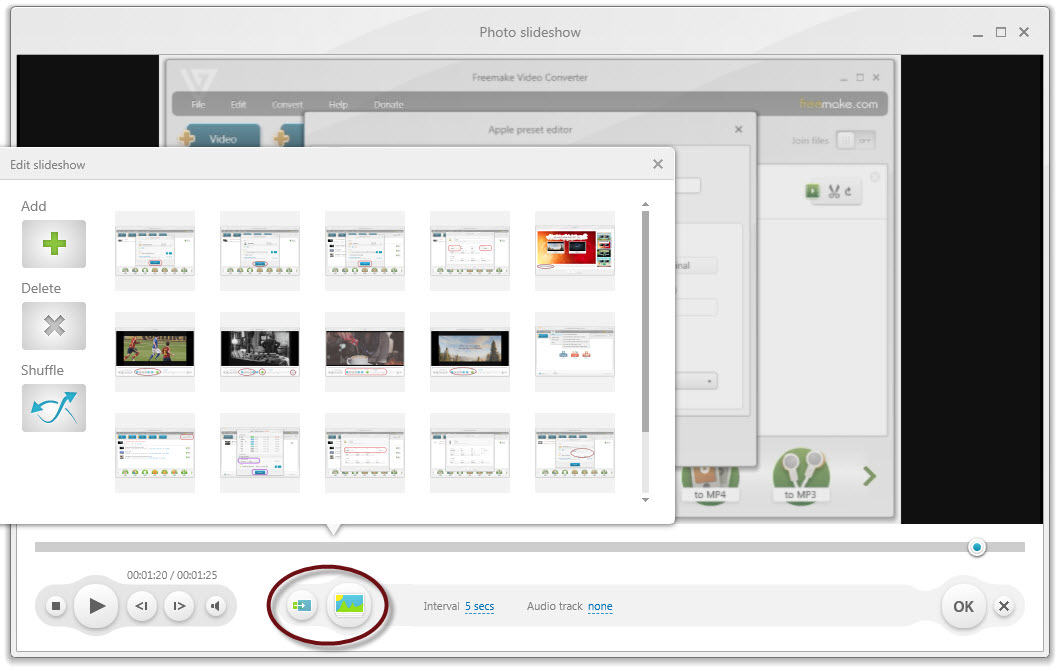
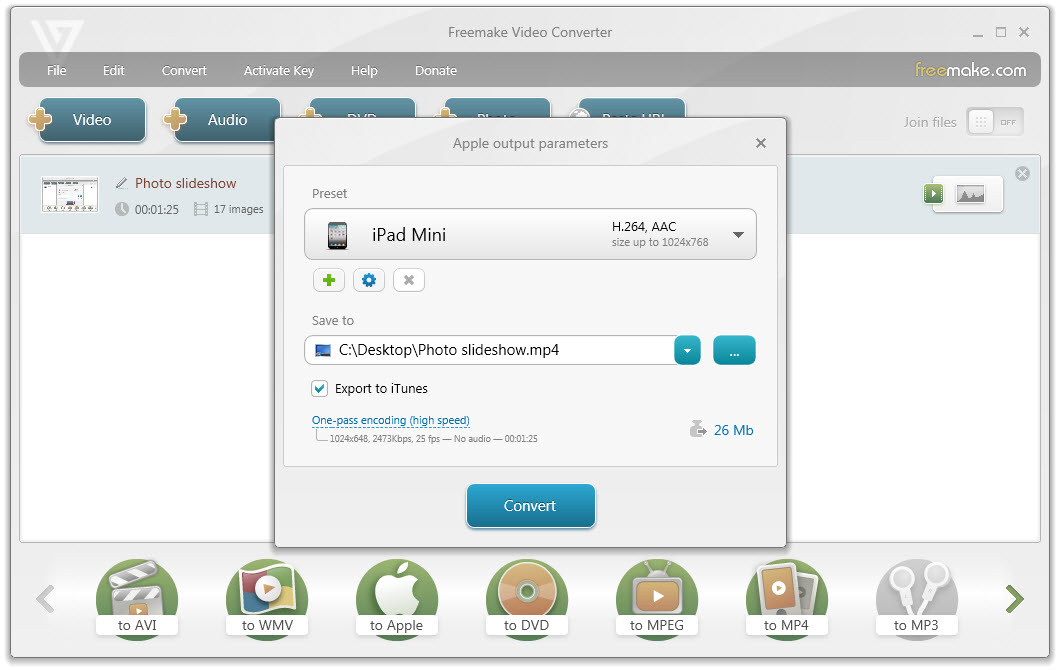
Make a slideshow with pictures and music fast using free Freemake Video Converter. The slideshow maker software will create videos from your photos and songs in a couple of easy steps. Watch the ready slideshows with effects on a smartphone, tablet, TV, or upload it online right from the tool.
All popular image and audio formats are supported.

The best way to create slideshows for social media or content backup!
Free Download
Get the job done in these easy steps:
1. Download free slideshow maker
2. Add images into the video maker
3. Add background music
4. Set duration & transitions
5. Make a video slideshow with music

Here is how to make a slideshow with music and pictures for free:

1

Download free
Freemake Video Converter

Download free slideshow maker from Freemake. It's very easy to use! Please note that the freeware can be installed only on a Windows-based computer with Win Vista or a higher version. Save the installation file and launch it. To install the slideshow maker correctly, you should be connected to the Internet.

Choose a folder where you want to install the software and wait till the installation process is complete. By default, the app will start automatically. In case you want to use it later, deselect the option to run the utility at the end of the installation.

To learn more about other software features, please visit its homepage.
2

Add photos & pictures

Collect your pics for slides into one folder. In Freemake slideshow maker click the "+Photo" button. Select all the photos from the folder. You can also simply drag-n-drop the library into the app.

If you want the pictures to be particularly organized, you can either name alphabetically or in numerical order or reorder them right in Freemake. To do it, double-click the slideshow in the app to open a built-in video editor. Click the colorful button (with blue and green) at the bottom of the editor to change the order of your images. Move the images in a necessary sequence within the slideshow project. Here you can also shuffle the pictures, delete them or add more visual files.

You can add pics of various extensions and resolution. Keep in mind that by default the software changes the resolution to that of the smallest photo in the library to prevent quality loss. If you need, you can select a bigger frame size for your presentation. However, the borders will be added as a frame to small images.
3

Add music to video

Make your slideshow sound beautiful with a background track. Add an audio file that suits your content best of all. Then click "No audio" in the slideshow line and select your music. Please note that you can add only one non-protected song to your photo slideshow.
4

Set duration & transitions

Double-click the slideshow with music to launch the video editor. Here you are able to set the interval for each photo - from 1 second to 20 seconds. The longer the time period, the longer your slideshow will be. You'd better choose the 5 secs interval to get a video slideshow of several minutes.

Set transition effects if necessary. Freemake offers the special the "panorama" effect which zooms in and out the photos in the slideshows.

Preview the photo slideshow template to make sure it looks good. Click "OK" to proceed to the video creating step.
5

Make a slideshow with music free

After that, you need to turn pictures and music into a video. Select a format in which you want to save a presentation. If you want to enjoy it on a phone (both iPhone and Android), tablet or share online (e.g., embed on your blog or upload to Instagram), we recommend choosing the MP4 option. For TVs, choose the AVI format. For old phone models, go for 3GP, and so on. Use the "to YouTube" output option to upload photos to YouTube directly from the program interface.

Click a button with the necessary extension. Then choose one of the ready format templates you need. If you have a specific gadget, you can create a custom profile for it with the necessary settings such as video resolution, codec, bitrate, and others.

Set a folder for your new photo presentation. Click the "Convert" button & wait a bit.

When the video file is ready, you may upload it to your device, share online with friends, or embed into your WordPress blog with free Freemake Slider plugin.