Most of you know how to make simple video editing like removing black bars or reducing video file size before uploading it to YouTube. Though, not everyone knows that it’s possible to edit video right on YouTube. Please note that the official YouTube editor (available at youtube.com/editor) was closed on September 17, 2017.
But you needn’t worry! If you need to merge videos, you’d better do it beforehand with corresponding software from this post. Alternatively, you can use YouTube Enhancement tool to do the following changes right on YouTube in real time:
- edit video thumbnail;
- add advanced video details;
- add filters and change video colors;
- add a slowmo or time-lapse modes;
- trim, rotate and join several YouTube videos;
- add audio to video;
- add annotations and YouTube cards;
- add subtitles.
Now let’s have a look at each of these features in detail and learn to use them.
SEE ALSO: 10 Secret YouTube Tricks You Should Learn
SEE ALSO: YouTube Upload 101: Account, Specs, Limits, Formats
Create custom thumbnail
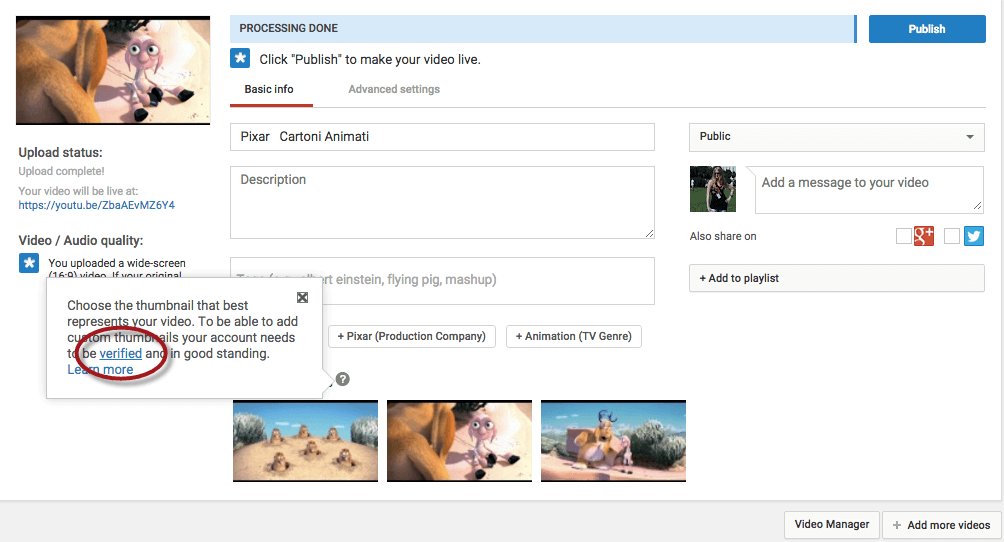
As you can see, every YouTube video has a thumbnail – a small picture that reflects video content. This thumbnail can be easily set by a user. When your uploading process is completed, YouTube offers 3 options of thumbnails by default. If your account is verified, you’ll be able to add a high-quality image from your PC. In case your account is not verified, you can either use default thumbnails or verify it by following these steps:
- Click the ? sign above the default thumbnails.
- Click Verified and open the link in a new page.
- Select your country.
- Select an option to text you a verification code.
- Click Submit and wait for your code.
- Add a code in an appropriate filed.
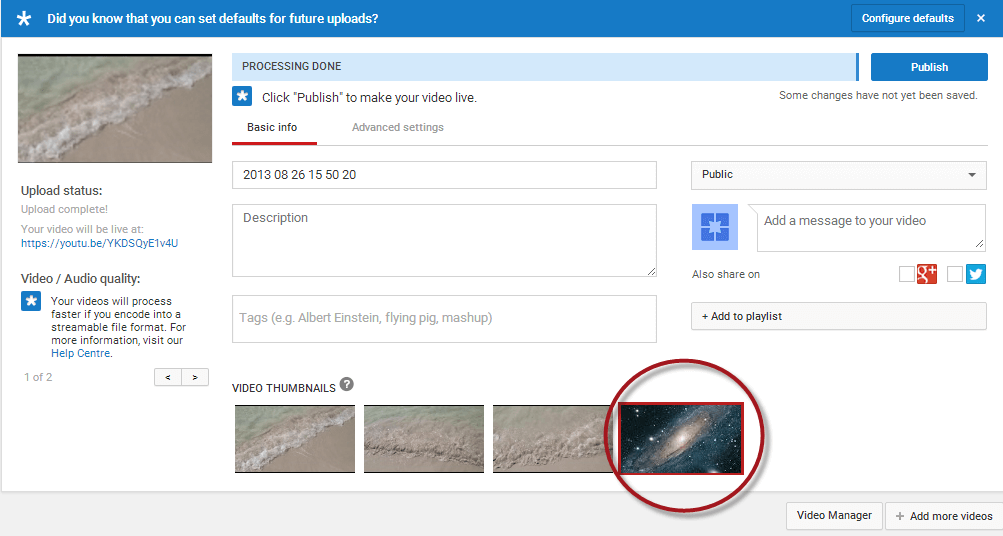
From now on your account is verified and you can set custom thumbnails on YouTube. To do this, choose Add custom thumbnail and select an image from your local drive.
Add advanced video details
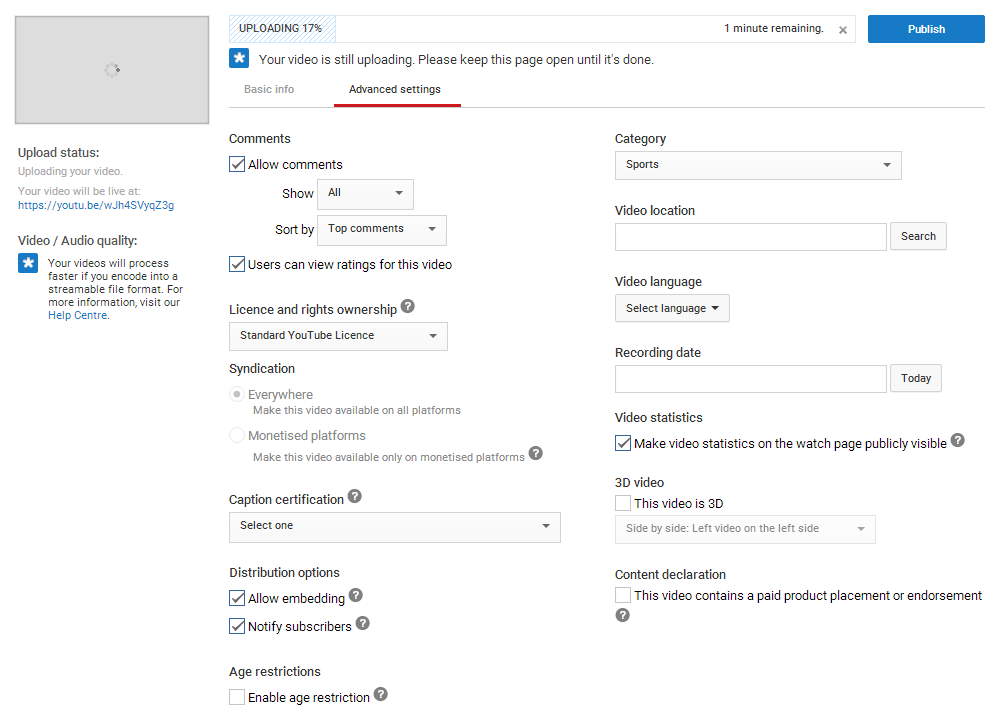
Apart from title, description and tags, there are some more settings to choose. Go to Advanced settings and have a look at them. First of all, select video Category. Thus, people may find your video while browsing a particular category, for example, sports or animals.
If you are interested in other people’s opinion, choose to open comments and let your subscribers share their thoughts with you.
You can also set distribution options. In case you want your video to be available only on YouTube, deselect Allow embedding option. Now, when someone tries to paste your video on a site, all the viewers will be redirected to YouTube to watch it.
One more important thing is Age restrictions. Don’t forget to select this option if your video content should not be watched by kids.
Add filters and color options
If you think your video is too bright or dark or requires any color changes, you can change it right on YouTube. Follow these steps to change your video colors.
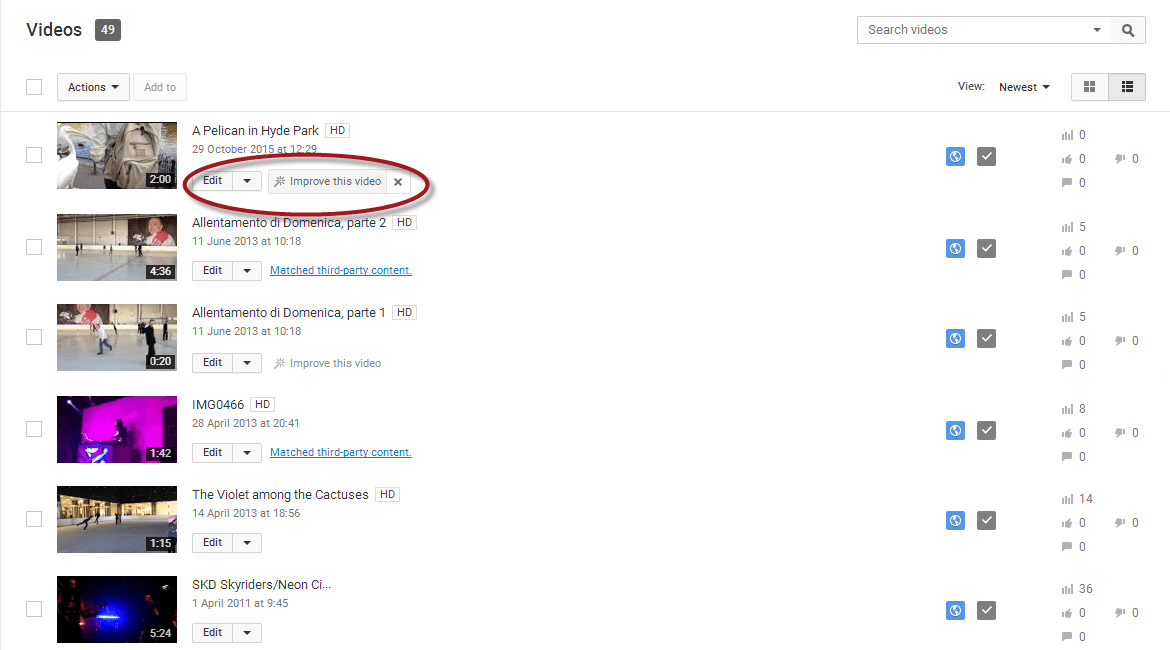
- Go to the Video Manager and choose the video you want to edit.
- Click Edit.
- Choose Enhancements.
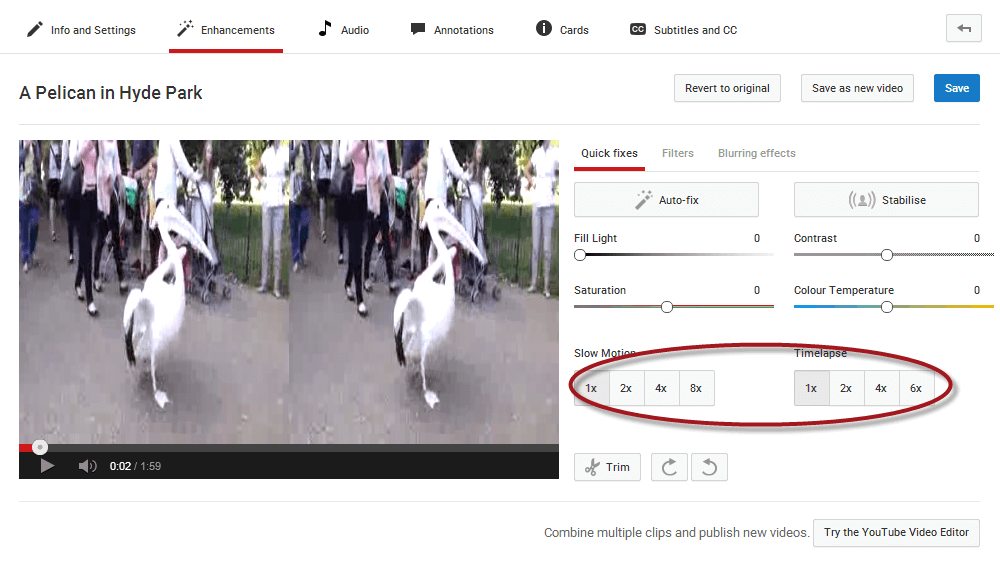
As you can see, there are a lot of settings here. In case you don’t want to bother your head with all these options, just choose Auto-fix. Video editor for YouTube will enhance your video automatically. You can also Stabilize your video image if necessary.
For those who want to control everything, there are manual settings for Contrast, Color Temperature, Saturation and Fill Light. Move the runner to the right or to the left to change color parameters. The preview of your changes is available on the same page, so you can see whether further enhancements are necessary.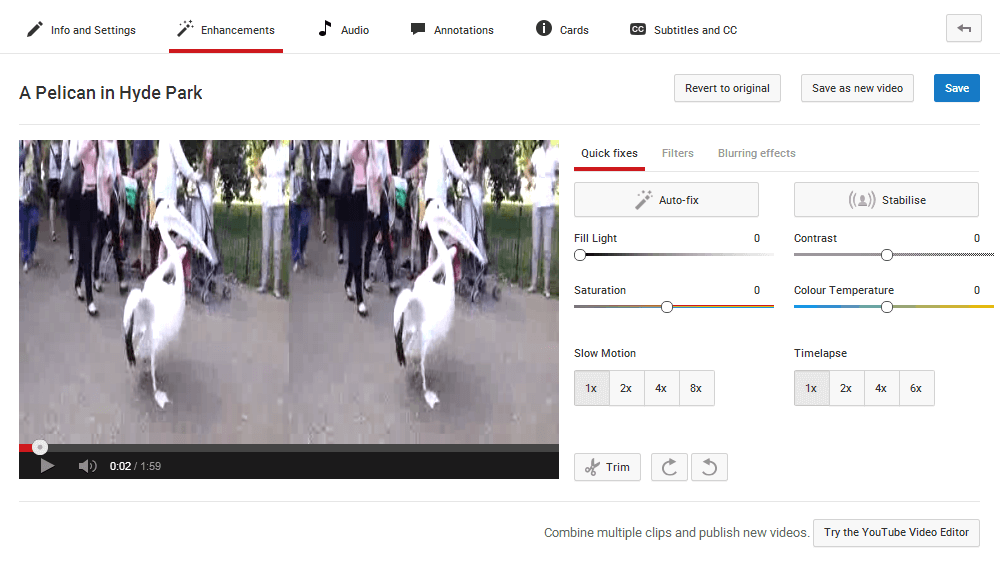
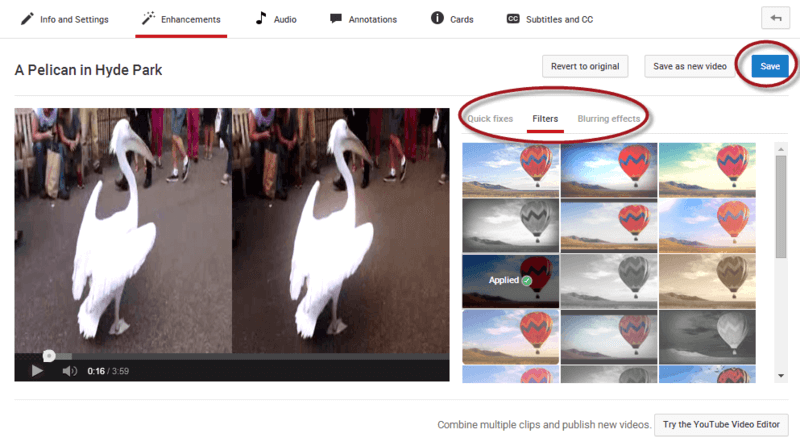
If you like adding filters to your videos, click Filters option and choose a filter to your liking.
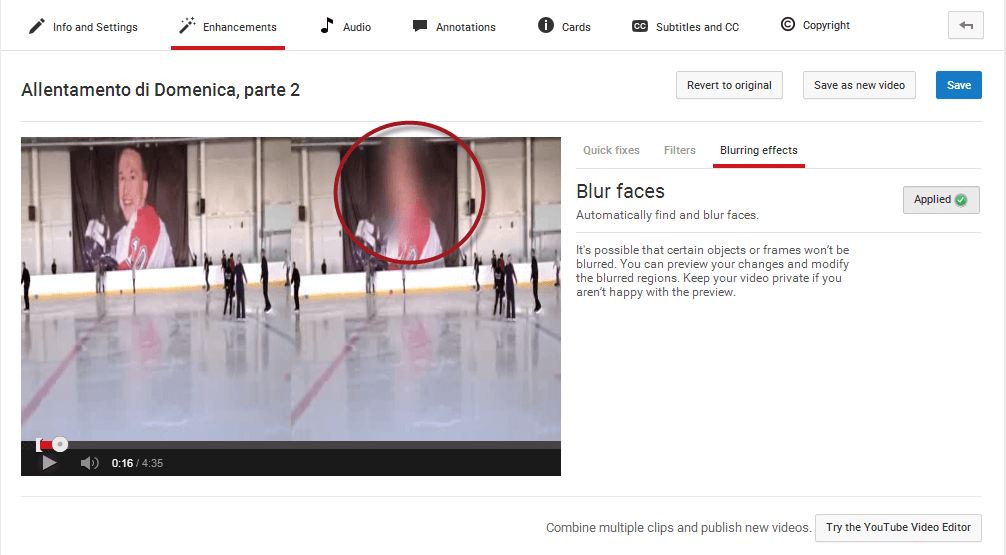
One more setting in Enhancements is Blurring effects. Use it when you want to blur people’s faces or any other private details in your video.
When you are done with color editing, don’t forget to click Save to save all the changes.
Turn video into slowmo or time-lapse
Enhancements page offers two more options for your video: time-lapse and slow-motion modes. It means that you can either speed up your video or slow it down. There are four speed settings available. You can make your videos 1x, 2x, 4x or 6x faster or 1x, 2x, 4x, 8x slower.
Trim and rotate YouTube video
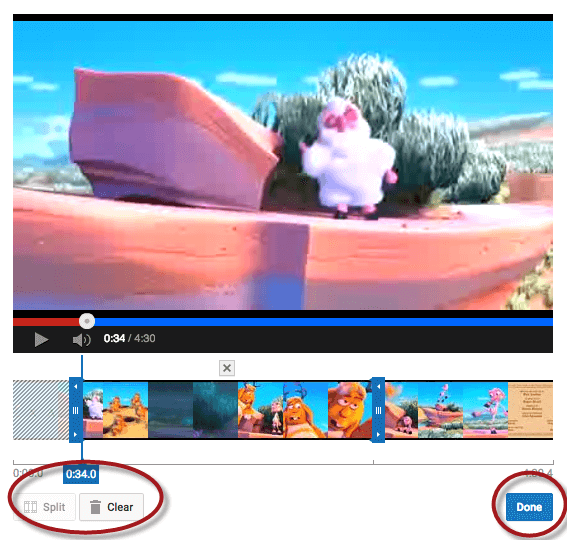
In case your video contains ads or any parts that you want to cut, use the Trim option in Enhancements. Here is how you can do it:
- Click the Trim button.
- Click Split.
- Set the beginning and the end of a part that you want to delete.
- Click the grey cross above the video part.
- Click Done to confirm settings.
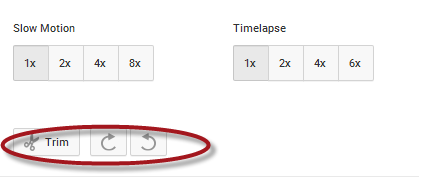
To rotate a video, use the arrows near the Trim button.
Join and edit several YouTube videos
Before September, it was possible to join several YouTube clips into one with YouTube editor right online. Now you should do it beforehand. If you have videos on your PC, use Freemake Video Converter. Check these guides to learn:
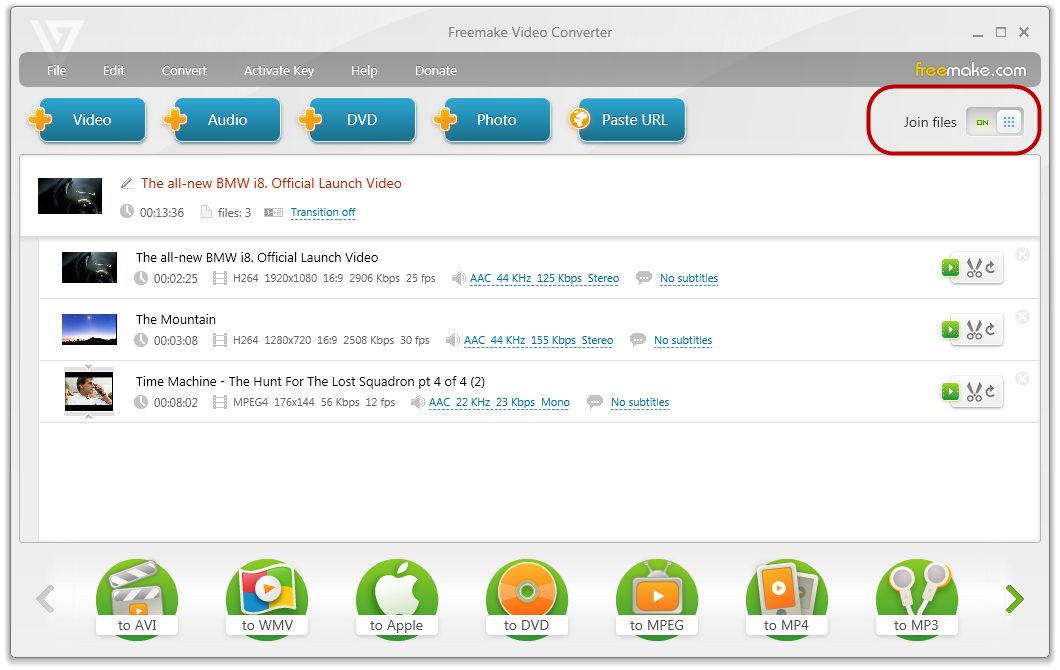
In case the videos are online, you should first download them with the same software. To do it, use the Paste URL button and then follow the guide to join videos.
Add audio to a single YouTube video
Sometimes YouTube blocks audio tracks in your videos. It happens when the songs violate copyright laws. If it happened to you, don’t worry. YouTube has over 150.000 free music tracks that you can use for your video.
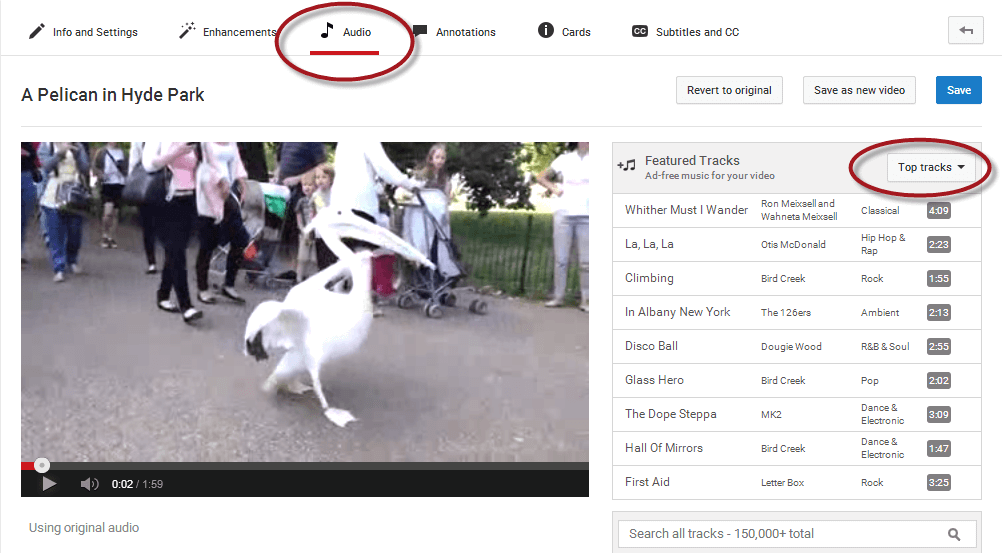
To add an audio to your video, follow these guidelines:
- Go to Video Manager.
- Select a video and click Edit.
- Click the Audio tab.
- Search for a music track. You can search songs by genre or just select something from Top category.
- Preview the track.
- Click Save to add a chosen audio to your video.
Add annotation to YouTube video
Whenever you make an educational video, you may need to add annotations to it. You can easily do it in default YouTube editor. Here is the procedure:
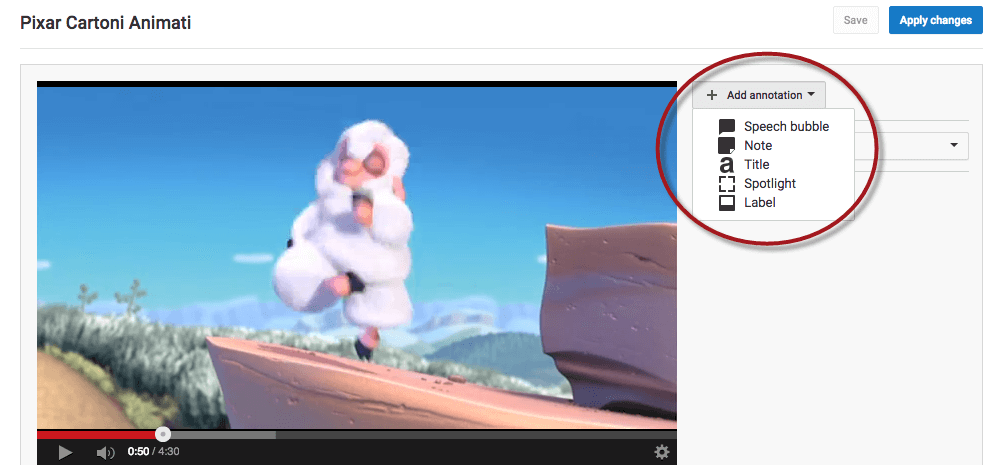
- Open YouTube editor.
- Choose the Annotations tab.
- Click Add annotation.
- Choose annotation type.
- Use video timeline to set the time when your annotation should appear.
- Type and customize your text. Select font size, type and background.
- Correct start and end time if necessary.
- Mark Link option if you need to link to a corresponding video, playlist or channel. You may also choose Subscribe option and invite people to subscribe to your account.
- Set the time when the video should start.
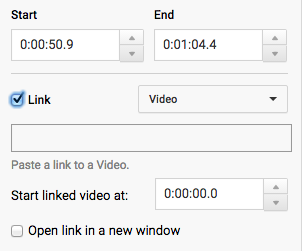
If you give a link to a single video, it’ll start playing from the time you set. While for playlist or channel, there will only appear the URL itself.
Add YouTube Cards
YouTube card is a kind of YouTube annotation. However, it has more interactive options. YouTube card may be used to create a call to action, to add a link to a specific site (approved by YouTube), channel or video. Learn more about YouTube Cards here.
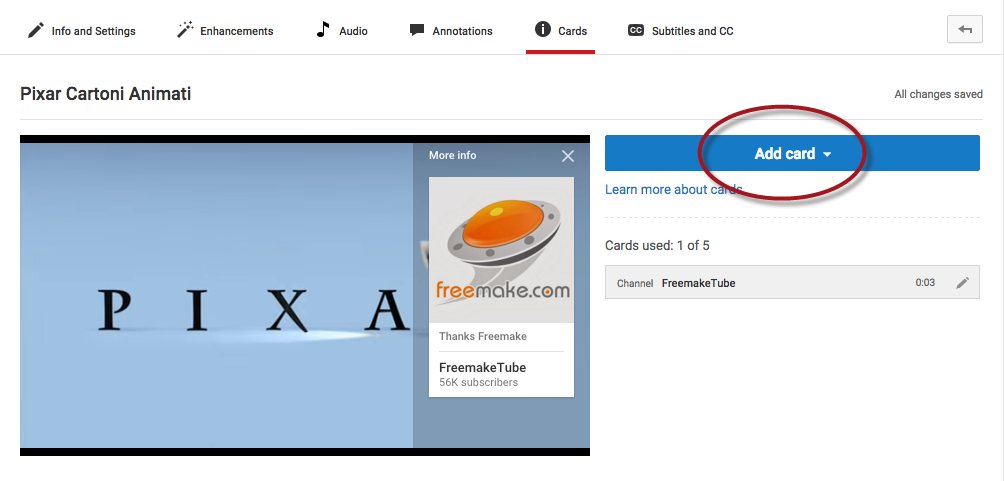
To add a card to your video, follow these steps:
- Choose the Cards tab on YouTube editor page.
- Set the exact time for your card to appear.
- Click Add a card and then Create.
- Choose a card type.
- Paste a necessary URL and text for teaser and description.
- Preview your card.
Add subtitles to YouTube video
It’d be great if you add subtitles to your video especially if it’s not in English. Thus, you’ll attract more viewers and potential subscribers.
To add subtitles, check the guide below.
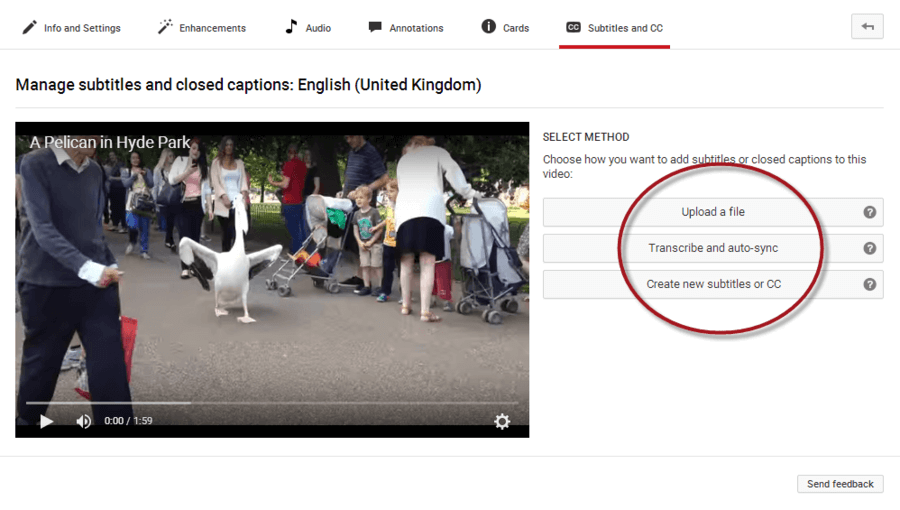
- Open the Subtitles and CC tab in the editor.
- Select your video language.
- Click Add subtitles. There are three ways of adding subtitles to your YouTube video. You may upload a ready SRT file, add a full transcript manually and let YouTube automatically set the timing, or add subtitles and captions on the fly while watching a video.
When you finish all the editing’s, get back to the Info and Settings tab and click Publish to make your video appear on YouTube.
Now you know how to use YouTube Editor with maximum efficiency. Please share this post with your friends and let them also become a YouTube guru!