
Slideshows are an excellent way to display photos, videos or any other type of content in front of an audience. More often they are used by photographers of all ranks and PC users to organize multimedia footage into beautiful clips for online sharing or YouTube upload.
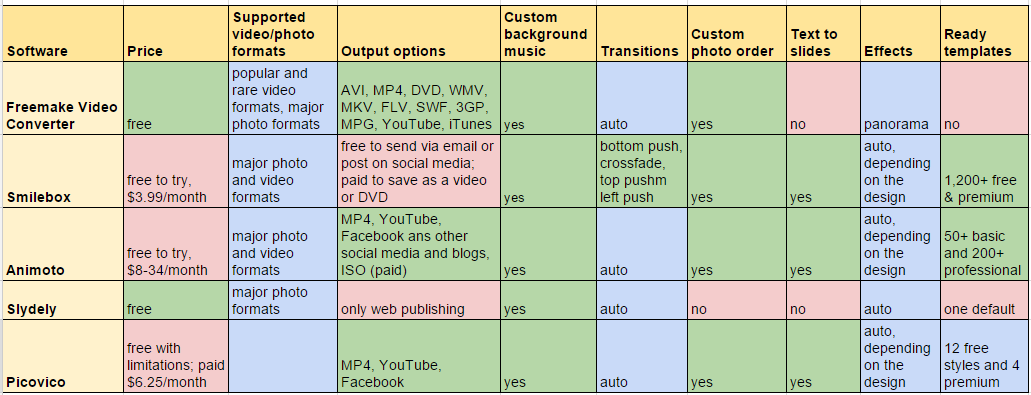
Windows OS can show your photos and videos in the slideshow mode once you hit F5 button in the default Windows Photo Viewer. However, this slideshow can’t be further transferred online or burned to a CD. So you can’t do without a good slideshow maker which outputs slideshows in a video format. We collected for you the best tools which will help create amazing slideshows free and easily. For a quick decision, have a look at the comparison table below and choose the best slideshow maker to suit your needs and pocket.
Freemake Video Converter
Freemake Video Converter is a free Windows software which allows users to turn photos and videos into beautiful slideshows.
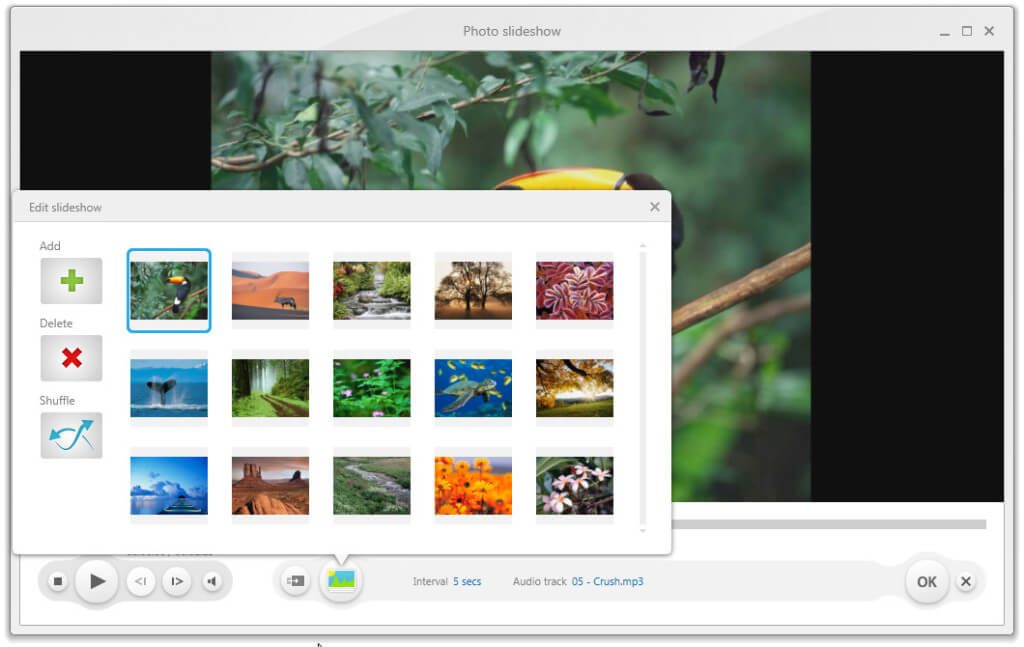
The slideshow making process is easy and fast:
- you add your footage;
- edit the slideshow if necessary (add music background, order images, set the time for slides, apply effects);
- convert to video or upload to YouTube.
SEE ALSO: How to Create Photo Slideshow with Music Free
If you want to mix photos and videos, don’t forget to turn on video join option.
 Pros:
Pros:
- it’s completely free;
- option to add DVD parts using DVD Ripper into the slideshow;
- no signup needed;
- dozens of output video options;
- direct upload to YouTube;
- possibility to write slideshows onto a DVD with DVD burner software.
Cons:
- no ready templates;
- only one effect;
- no ability to add text to slides.
Verdict: Freemake Video Converter is ideal for quick slideshow making when you just need to arrange your photos into a video steam. It’s also the best option for slideshows containing a large number of pictures.
SEE ALSO: Where to Get Music for your Slideshows
Smilebox
Smilebox is another Windows tool for making collages, ecards, invitations, etc. To get most of it, you have to sign up and buy Club Smilebox subscription for $3.99/month. With it, it’ll be able to use any of 1,200 premium templates and save your slideshow in video or DVD format.
To create a slideshow in Smilebox, you need:
- choose a design and click Personalize;
- upload your photos;
- transfer photos to slides or let the tool auto-fill them;
- add text, music, background if necessary;
- preview and share your slideshow.
Tip! If you don’t want to upgrade to save the slideshow as a video, you may screencast the preview with the help of these free tools.

Pros:
- multiple ready templates;
- auto-fill option;
- possibility to comment slides;
- slideshow emailing.
Cons:
- you should signup;
- few free designs;
- no free video saving;
- annoying software notifications.
Verdict: Smilebox is a perfect choice for a regular use. If you just need a single slideshow, it’s not worth paying or trying getarounds to get the video. Still the templates are more than fabulous.
SEE ALSO: 5 Best Invitation Makers to Send Online and Paper Invites
Animoto
Animoto is an online photo slideshow maker. It provides a free 14-day trial period of PRO account. Then you’ll have to upgrade or register another trial account. The plans depend on your needs: $8/month (billed annually) for personal use with Animoto logo on output; $22 and $34/month for professional use with more advanced options.
To make a slideshow in Animoto, follow the steps:
- sign up for a trial account;
- select a style and click Create video;
- upload your footage;
- edit the slideshow (change a song, arrange photos, add a logo);
- once the slideshow is ready, click Produce and share or download the video in the quality you need.
Even with a trial account, you’ll be able to download the resulted video to PC, upload to YouTube or share via email.
Pros:
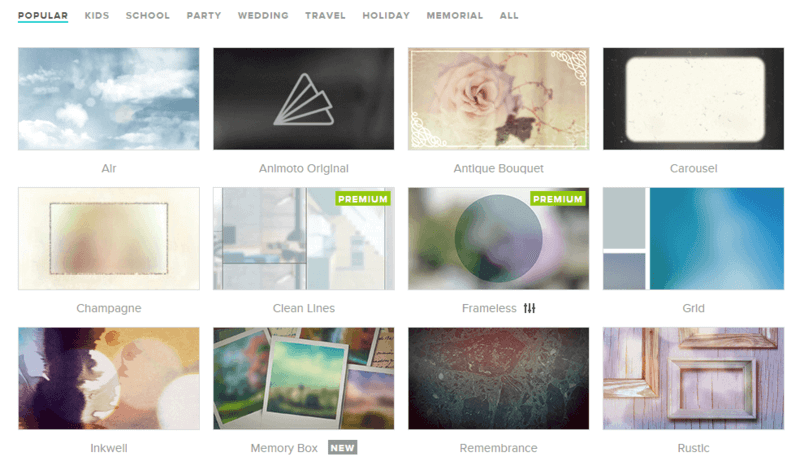
- dozens of professionally designed templates;
- a big library of licensed songs;
- possibility to add call-to-action and your own logo;
- inbuilt photo editor;
- all unfinished videos are saved in your account;
- discounts for educators.
Cons:
- HD video quality only for paid users;
- watermark on trial slideshows.
Verdict: Animoto is great for professional use. Even a trial account lets work miracles with your photos.
SEE ALSO:
Animoto for Education: Simple Video Maker for Schools
Slydely
Slydely is a free online app for slideshow creation and sharing. It’s simple and stylish.
To use it, you need:
- upload your photos or add them from your social media accounts;
- add a music file or choose among available tracks;
- add title, description, tags for your slideshow, make it public or private;
- click Save.
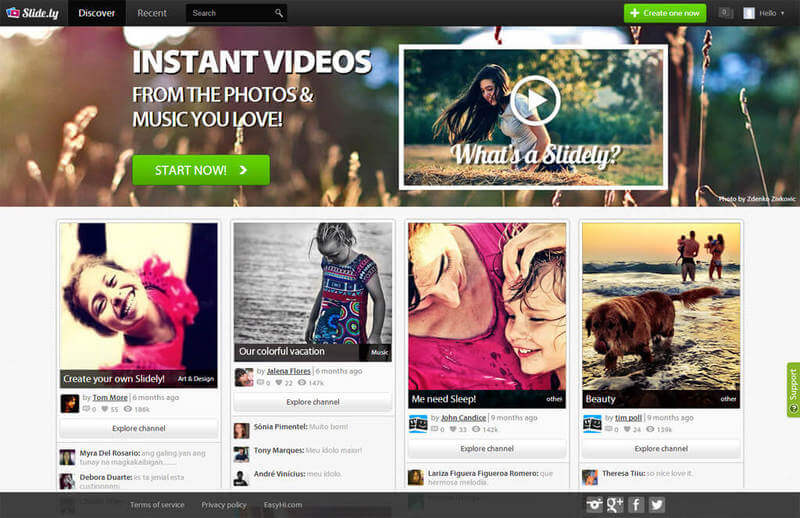
Unfortunately, there is no slideshow download option. You may keep it in your account, share with Slidely community or record the slideshow from your PC screen. Moreover, on this website you may follow other people and borrow their slideshow ideas.
Pros:
- free and online;
- skilled Slydely community;
- image upload from multiple social accounts;
- views and likes stats;
- basic music library.
Cons:
- maximum 90 photos can be added;
- no video support;
- only one default template for slideshows;
- no download option.
Verdict: Slydely is perfect slideshow creator for fast work and sharing online.
Picovico
Picovico is another online tool to turn photos into videos. To use it, you need to register or sign in with Facebook. It offers free and premium ($6.25/month, billed annually) accounts. The free one has the following limitations:
- 5 videos per day;
- 360p max. quality;
- 25 max. slides;
- 6MB max. photo size;
- 15MB max. music size.
To create a slideshow here, do as follows:
- login and click Create video;
- add photos and arrange them;
- add captions and background music if necessary;
- choose video quality, visibility settings, etc. and click Make video;
- when the video is ready, you may download it or share on the Internet.
Pros:
- beautiful templates;
- a good collection of background tracks;
- video viewing stats.
Cons:
- only 360p video quality for free download;
- 25 slides limit for free account.
Verdict: Picovico is good for making slideshows for mobile devices or sharing online.
So which tool do you opt for?